Clip Effects
Effects from the Effects panel can be dragged and dropped onto a clip. A small letter icon is then shown at the top of the clip. You can click the letter icon to show the effect properties in the Properties pane; right click will allow you to remove the effect, or to show its properties. Most effect properties can be animated, that is, they can be set to change value over time.
You can copy all the effects (including the effect keyframes) to a clipboard, using Copy from the Preset Menu. Select another clip and then use Paste from the Preset Menu to paste. In this case you cannot paste using the keyboard shortcut.
Bars

Adds coloured bars around the clip. Letter icon: white B on black  . The properties are:
Bar Colour - chosen from the Effects colour selector
Top Size, Bottom Size, Left Size, Right Size - the size of the coloured bar from the top, bottom, left or right. It can be set between 0 to 1, where 1 is the on screen clip height (for top/bottom) or width for left/right). The slider adjustment is limited to 0 to 0.5.
ID - A read only identifier string for the effect.
You can add more than one bar effect to a clip, for example if you want different colours on each side.
Blur

Blurs the clip, making it seem out of focus. Letter icon: white B on teal  .
.
This effect applies a Gaussian blur to the clip. The properties are:
Horizontal Radius, Vertical Radius - the radius 0-100 over which the blur algorithm is applied. If either value is set below 1, no blur happens.
Sigma - the sigma factor of the blur algorithm. This factor may not be used currently.
Iterations - how many times the blur algorithm is applied.
ID - A read only identifier string for the effect.
Brightness and Contrast

Adjusts the brightness and contrast of the clip. Letter icon: white B on blue  .
.
The properties are:
Brightness - settable between -1 and 1, with 0 being unchanged brightness
Contrast - settable between 0 and 100 using the slider control, and accepting a wider range including negative numbers if keyed in. 0 represents unchanged contrast.
ID - A read only identifier string for the effect.
Chroma Key

Makes a colour in the clip transparent. Sometimes known as green screen. Letter icon: white B on green  .
.
In the clip, where a pixel colour matches the chosen colour closely enough, that pixel is made transparent. Commonly a person will stand against a green background. The green background becomes transparent, and a clip on a lower track becomes visible.
The properties are:
Key Colour - The colour in the clip that is made transparent; chosen with the Effects colour selector
Fuzz - A number representing how closely a colour in the clip must match the Key Colour, for transparency to be set. Technically, this is an “RGB colour difference”. Transparency for the pixel is either set (alpha = 0) or left unchanged. The slider control allows you to set a value up to 25 - but in practice you may need a value very much greater than that, maybe in the hundreds.
ID - A read only identifier string for the effect.
You will often need to add more than one Chroma effect to a clip, if your background colour is not entirely uniform.
Colour Shift

Shift the individual component colours of the clip up, down, left, and right (with wrapping). Letter icon: white C on black  .
.
The properties are:
Red X Shift, Red Y Shift - Moves the red component of each pixel in the clip, with wraparound at the edges.
Green X Shift, Green Y Shift - Moves the green component of each pixel in the clip, with wraparound at the edges.
Blue X Shift, Blue Y Shift - Moves the blue component of each pixel in the clip, with wraparound at the edges.
Alpha X Shift, Alpha Y Shift - Moves the alpha component of each pixel in the clip, with wraparound at the edges.
ID - A read only identifier string for the effect.
The default shift property values are 0; a value of 1 represents a shift of the clip width or height.
This is a specialist effect, similar to Shift but with each colour controlled separately.
Currently it appears the the effect works in reverse: for example instead of shifting the green component, it leaves the green component in place and shifts everything else.
Crop

Crop the sides/top/bottom of the clip. Letter icon: white C on black  .
.
The properties are:
Left Size - Crops the clip from the left edge. Set 0-1 where 1 represents the clip width on screen [check – pixels??]
Right Size - Crops the clip from the right edge. Set 0-1 where 1 represents the clip width on screen.
Top Size - Crops the clip from the top edge. Set 0-1 where 1 represents the clip height on screen.
Bottom Size - Crops the clip from the bottom edge. Set 0-1 where 1 represents the clip height on screen.
ID - A read only identifier string for the effect.
The region cropped effectively becomes transparent. [check this]
De-interlace

Remove interlacing from a video. Letter icon: white D on green  .
.
This effect removes alternate lines from a clip. The resulting clip is resized so that it retains its original size. This may be most useful when converting interlaced video made for traditional TVs to “progressive scan” non-interlaced standards. By removing alternate lines you may reduce imperfections particularly noticeable with moving objects, at a cost of reduced resolution.
IsOdd - If Yes: removes lines 1,3,5,7 … If No: removes lines 0,2,4,6… This setting can only be accessed by right clicking.
ID - A read only identifier string for the effect.
[nb this doesn’t seem right! Old tv footage would be a frame of even lines then a frame of odd lines – but I guess it depends on the presented format – probably leave this as it is]
Hue

Adjusts the clip’s hue / colour. Letter icon: white H on black  .
.
The properties are:
Hue - a value between 0 and 1, where 0 (the default) gives no change. In the HSV (Hue, Saturation, Value) colour model, hue can be represented on a colour wheel [pic]. The Hue effect value changes each pixel’s colour, in the order red – green – blue – red. It is equivalent to a rotation of the colour wheel, with 1 representing a full turn. For example, a value of 0.333.. changes red to green, and changes green to blue, and changes blue to red.
ID - A read only identifier string for the effect.
Alpha Mask/Wipe Transition

Uses a greyscale mask image to gradually wipe / transition between 2 images. Letter icon: white M on magenta  .
.
[to be written]
The properties are:
Source - right click… Any file name typed in manually is ignored.
Brightness - animation to be set manually
Contrast - animation
Replace Image - right click to select Yes or No.
ID - A read only identifier string for the effect.
[hey, it accepts an mp4 mask! - but this only works sometimes]
Negative

Invert colours to produce a negative of the clip. Letter icon: white N on orange  .
.
Each pixel’s individual RGB components are inverted by subtracting them from their maximum value. For example, if RGB components are represented 0-255, then (red) becomes (255-red).
There no adjustable properties. The only property is:
ID - A read only identifier string for the effect.
Pixelated

Pixelate (decrease the number of visible pixels). Letter icon: white P on black  .
.
The properties are:
Pixelisation - settable between 0-1, with a default value of 0.7. Higher values give exponentially increasing pixelation. A value of 1 itself is actually invalid.
Left Margin, Right Margin - sets a margin which is not pixelated. Values are between 0-1 where 1 represents the screen width.
Top Margin, Bottom Margin - sets a margin which is not pixelated. Values between 0-1 where 1 represents the screen height.
ID - A read only identifier string for the effect.
The exact mechanism is that the frame image size is internally reduced by a factor of (1-Pixelisation) and then the image is rescaled to size, having lost pixel resolution in the process.
Colour Saturation

Adjust the colour saturation. Letter icon: white S on red  .
.
Colour saturation refers to the intensity or brilliance of colours. Increased saturation makes colours appear more pure and intense.
The properties are:
Saturation - adjusts the saturation. A value of 1 (the default) leaves the colours unchanged. A value of 0 makes the clip greyscale. Values above 1 increase the saturation.
ID - A read only identifier string for the effect.
Shift
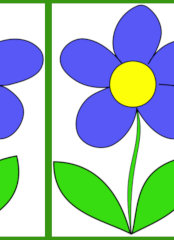
Shift the clip up, down, left, and right (with wrapping). Letter icon: white S on black  .
.
The entire clip is moved (shifted), wrapping around where the image goes over the edges.
The properties are:
X Shift - moves the clip along the X axis. Parts of the image that disappear from the right edge re-appear at the left side (and vice versa). Settable with the slider between 0-1, but larger values can be entered from the keyboard. 1 represents a shift of one screen width.
Y Shift - moves the clip along the Y axis. Parts of the image that disappear from the bottom edge re-appear at the topside (and vice versa). Settable with the slider between 0-1, but larger values can be entered from the keyboard. 1 represents a shift of one screen height.
ID - A read only identifier string for the effect.
Wave
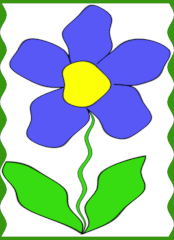
Move the clip horizontally in a dynamic sine wave pattern. Letter icon: white W on black  .
.
Each line of the clip is moved left or right in a sine wave pattern. The sine wave pattern itself moves upwards, giving a dynamic wave effect. Each line wraps around at the edges.
The properties are:
Amplitude - The amplitude (height) of the sine wave applied. Default value : 0.3.
Multiplier - In effect the amplitude is multiplied y this value. Default value : 0.2.
Vertical Speed - The speed at which the sine wave moves up the vertical axis. Default value: 0.2.
Wave Length - adjusts the wavelegth of the sine curve that is applied. Default value : 0.06.
X Shift - moves the entire clip on the X axis, wrapping around at the edges. Positive values move the clip left, and negative values move the clip right. The default value 0 leaves the clip unchanged. [ what’s the scale?]
ID - A read only identifier string for the effect.
This effect is probably best applied using experimentation. The visible effect will change if you change the project profile.
[need to read the code to be precise; looks like some daft parameters here; wow, it’s weird. x shift seems to be in units of 4 pixels?? Depends on the profile – change that and it all changes]

Effects colour selector
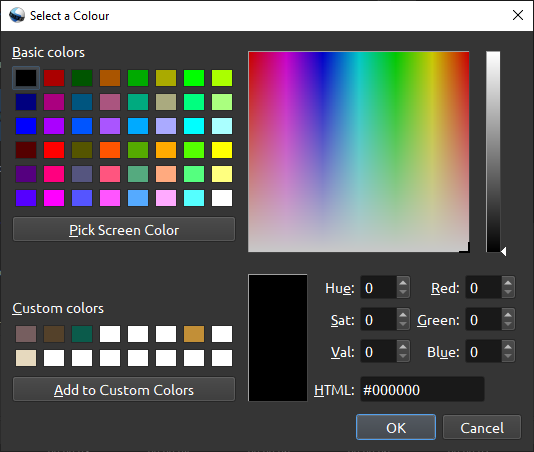
This allows you to choose a colour to be used by an effect.
You can choose
from preselected colours,
by entering an HMTL colour value.
You can also click the “Pick Screen Color” button, then click somewhere on your screen to choose that colour.
You can also save and then use a custom colour. To save a custom colour, select its box by clicking, then choose the colour, then click on the Add to Custom Colors button.